Infrared Photography, Notes for the Slightly Obsessed
I've been out and about a lot with my infrared camera lately. The invisible-to-our-eyes spectrum has fascinated me for a long time, and back in 2019 I finally had my somewhat beat-up Canon 20D converted. A few years later I'm still shooting IR in the Canon system, but now with a modified EOS RP. Thanks to the drop-in filter adapter I can pick the light spectrum I want on the fly, and thanks to the EF mount I get a giant lens park to play in.
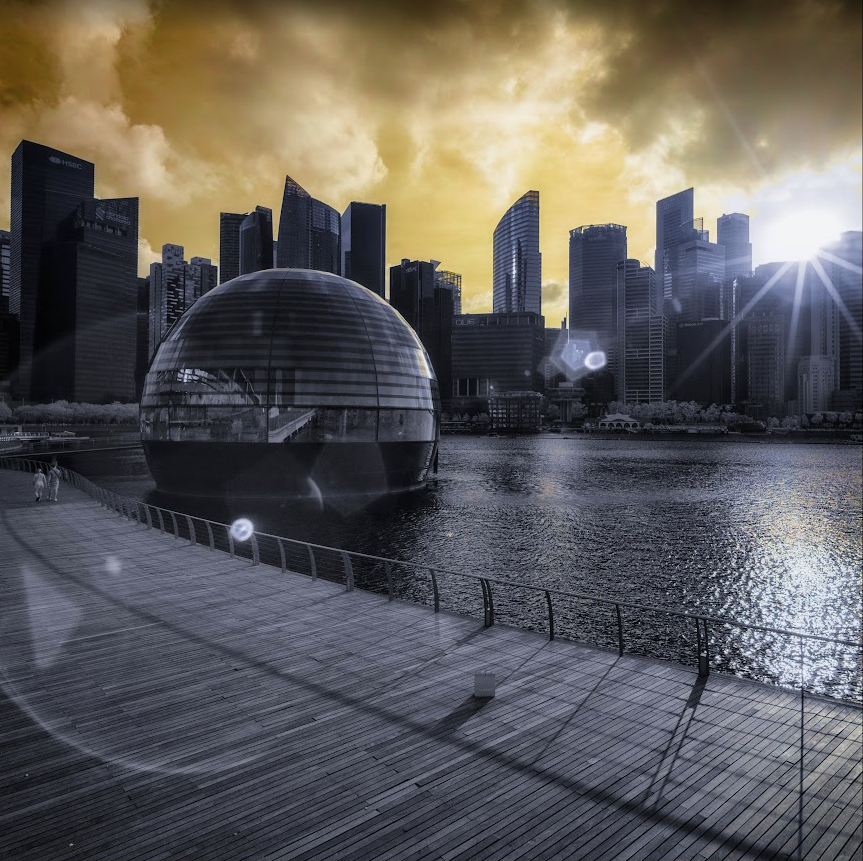
Anyone getting into infrared photography quickly notices: the usual image editing tools hit their limits here. Lightroom in particular, my tool of choice for years, is really not built for IR. It gets in your way at the very first step - setting the white balance. IR images are very warm (red, basically), and to compensate you have to push the white balance slider dramatically to the left into the "cold" range. Lightroom unfortunately has a hard-coded lower bound that is "too warm".
Resourceful users found a workaround: camera profiles! Turns out you can create and register camera-specific profiles in Lightroom. Getting there is a bit fiddly though, especially if you're trying to sidestep Lightroom's built-in limits. The solution? A free DNG tool from 2012 (!!) by Adobe, originally meant for converting manufacturer RAW files to DNG (more info here). Open a sample file in the tool, drag the color temperature all the way down under "Color Matrices", export the whole thing as a camera profile, drop it into Lightroom's profile directory, then either pick it manually or configure it as the default when this specific camera shows up as the author of a RAW file. Convoluted, sure (here's a tutorial), but at least you can now set a proper white balance for these files. One important thing: NEVER trust the auto setting. It's hard-tuned in LR. Great for normal shots, not great for special cases.
And the pain doesn't stop there - a lot of IR photographers eventually want to swap color channels. Lightroom is not exactly intuitive for that, and at the latest at this point you'll want to move to a "big" image editor.
The next issue: "intelligent" software like Lightroom often produces noisier IR images than necessary. Why? Because neither the development algorithms (in particular the demosaicing) nor Lightroom's famous denoising fit our use case. You don't always spot it immediately, especially not if you look at a downsized image instead of at 100%. But in practice, even when the image looks clean at first glance, you have much less headroom for corrections and less detail than you could have. And especially when adjusting color channels you'll hit limits and clip channels faster than you'd like.
Where does this come from? Simple: if you point a RAW developer at IR photos, you're basically forcing it to get confused. Unlike "normal" images, the image information is not evenly distributed across the four filters of a Bayer sensor. Instead the red channel is loaded with information while the green and blue channels are weak and noisy. The job of a RAW developer is to compute the "right" colors from those signal values using a suitable algorithm. Especially with high-ISO images, i.e. lots of noise, the software picks different algorithms than for low ISO. An IR image, particularly one taken during the day, often comes in at a low ISO (100, 200) but still has enormous noise in two of the three channels. So if you want to squeeze out the best result you need to tell the software up front how to develop the RAW. Many tools only allow that in a very limited way. Denoising is very similar: modern software comes with several specially trained AI models and picks them based on image metadata. Automatic denoising in Lightroom or in the DxO tools I usually love is a "hit and miss" affair. You just can't trust it blindly. In many of my shots these tools actually make the noise worse if I don't watch out.
All of these problems can of course be worked around in an image editor. Pros use channel-specific luminosity masks and do denoising the "classic" way, without AI tools. That gets tedious fast, and at least I sometimes lose track of what I'm even trying to do. Image editing gets mixed up with image development, and the result suffers.
So, what to do? I've been at this for a while and by now I've found decent solutions for a lot of these things. What I find interesting in hindsight is the journey I went on - from "blindly click through a tutorial and learn what to do to get a certain look" to "dig deeper and deeper into sensors, file formats, base processing". Especially around IR there's a lot written on the internet that is only half-true, or where the explanations don't quite match the effect. Hence this blog post. I don't claim to be error-free, but maybe these notes help someone who is past the simple basics and just wants to do it properly for once.
One thing to know up front: I don't see myself as a particularly strong image editor. Once my RAWs are properly developed I'm more of a tinkerer than a targeted editor. Photoshop & co are part of my toolbox, but 80% of the functions in there feel esoteric and dangerous to me. But at least the front end of the processing chain I think I've now understood well enough, so here's my workflow, as of 2025:
My workflow for maximum quality (my tools of choice: RawTherapee & DxO)
After a lot of trial and error I've built a workflow that combines the strengths of different programs. The basic idea: use RawTherapee for the technical groundwork on the RAW file, and only then hand it off to my favorite tool, DxO PhotoLab, for optical corrections and creative optimization. Both tools can of course be swapped for alternatives. The role of DxO PhotoLab in particular is interchangeable. But after years of experimenting I do consider RawTherapee the most powerful option, simply because the tool is basically arbitrarily configurable when it comes to the base algorithms. Close behind: Darktable. Personally I don't love DT, but I have to give it that it also offers lots of knobs and levers that are often optimized away or lumped together in the big productivity tools. And last but not least: my IR workflow is different from my workflow for "normal" images. For those I just stay in DxO from start to finish, and before that I mostly lived in LR. But back to the IR workflow.
The goal is to produce, in RawTherapee, a technically perfect but neutral 16-bit TIFF - a "digital negative". Only then does the actual editing begin. Why? Because the point is to interpret the sensor data in a controlled way and then lock that interpretation in. TIFFs are painfully large files, just as a word of warning. But they are lossless and give you maximum image information for further work.
Phase 1: The technical foundation in RawTherapee
This is where you make all the decisions that automated software would get wrong because of IR's quirks. We deliberately override the software's wrong assumptions.
Demosaicing - the single most important step
Here we decide how an image gets computed from the raw sensor data. At 100% zoom the differences become obvious.
- For 720nm filters (classic IR): I usually start with
LMMSEorIGV. These algorithms are optimized for high noise and prevent the typical "maze artifacts" that noise in the G and B channels can produce. If you're aiming for a pure black-and-white image,Monois worth a try - it often gives the sharpest results because it focuses on the clean red channel. - For 550nm filters ("Super Color"): For me
DCBhas proven a good starting point. My EOS RP doesn't have an anti-aliasing filter, and the documentation saysDCBis good at avoiding false colors on such sensors. - False color suppression: For 550nm shots this slider is worth its weight in gold. A value of 2 or 3 removes the typical pink/green blotches without hurting sharpness. For 720nm I leave it at 0 or 1.
White balance - manual control
Auto is essentially useless here, because infrared is invisible by definition. The images we're working with are a form of false color photography, and it's up to the photographer which effect to aim for. That said, you can of course click the auto button and depending on the tool something you like might come out. Just make sure you don't accidentally clip one of the channels. That's exactly why I set WB manually as a rule.
- Eyedropper tool: A click on healthy green foliage (which in IR reflects almost white) or on clouds is usually my first try. But again: you decide what color shift you want.
- Fine tuning: Nudge with the
TemperatureandTintsliders. - The power tool: If the image still has a color cast, RawTherapee has a special tool that feels like it was made for us: the
Red/Blue equalizer. This slider directly controls the ratio of red to blue and can eliminate stubborn casts. Why is it made for us? Because in IR the red channel is overrepresented at the expense of blue. The white balance shifts values between red and blue back and forth, and the equalizer lets you calibrate that ratio.
3. Exposure & noise reduction
- Exposure: I set exposure and black point so that the histogram clips neither on the left nor on the right. Important: I leave highlight recovery off, because it's optimized for visible light and produces weird results in IR. I also expose to the right when shooting (ETTR): I deliberately expose so bright that the highlights just barely don't clip. The reason: in IR the shadow detail drowns in noise very quickly. The only cure is to capture more signal, i.e. ideally to expose longer. Cranking up ISO is a bad idea, by the way, because that amplifies the noise too. So you want the lowest possible ISO with the most possible signal. Which means: aperture wide open, or long exposure time.
- Noise reduction: Here I focus exclusively on color noise (
Chroma). Luminance noise I don't touch. A manual pass on the Chroma slider very effectively kills the color blotches in the weak channels. - What NOT to do in this phase: sharpening, contrast, saturation, or any other creative tools. The goal is a "flat", neutral, but technically clean image.
Phase 2: Export as a digital negative
Once everything fits, the image gets prepped for handoff.
- File format: TIFF
- Bit depth: 16-bit (absolutely essential for quality!)
- Color profile: A wide color space like ProPhoto RGB or Rec2020. This makes sure none of the unique IR colors get lost on export.
Phase 3: The fun part in DxO PhotoLab (or another tool)
The exported TIFF is now a "well-behaved", clean image. The problematic IR artifacts have already been handled manually and correctly. Now DxO can play to its strengths without getting confused.
- Optical corrections: Apply DxO's first-class corrections for distortion, vignetting, etc.
- Contrast & clarity: Tools like ClearView Plus and the microcontrast slider now work beautifully.
- Creative work: If you want to swap channels for the "false color look", rotate the slider in the HSL tool by 180 degrees, or pass the TIFF over to Photoshop, Affinity or GIMP. Go wild.
- If some noise is still left: you'll notice right away - working from TIFF, all those almost magical AI denoising tools disappear, because they mostly work on RAW data and need it. But there are exceptions. The "classical" tools are still available of course, and some AI tools work too. Topaz Denoise AI, for example, handles TIFFs just fine, and many of the Photoshop automatics are still available.
This workflow may look convoluted at first, but it makes sure every decision is made by the tool best suited to make it. The result is visibly higher image quality and more flexibility for the creative side. It also optimizes for marginal utility. If you want to be pragmatic: take a look at the automatics and keep an eye on noise levels. Depending on the subject it may just not matter and a simple round with the auto sliders is enough. My final recommendation: if you shoot IR, seriously look at other RAW tools, even if your heart is with Lightroom. Even if you don't want to pick algorithms yourself, just the handling of white balance and IR-specific color shifts is often solved much better elsewhere. Tools like RawTherapee and Darktable are also free, so at least it doesn't hurt your wallet.
More reading?
- Demosaicing article on RawPedia
- Custom DNG Tutorial for setting a white balance for infrared photography
- Bayer sensor (Wikipedia)
- Advanced Infrared Photography Processing: The Power of Luminosity Masks
How do white balance and tint tools actually work?
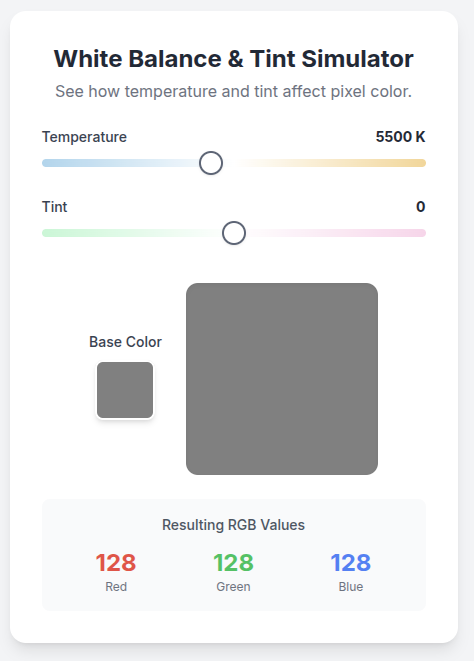
Every pixel is a mix of a red, green, and blue value. To compute that value, demosaicing algorithms make assumptions about the usual distribution and combine the sensor values accordingly. White balance then shifts the balance between the R(ed) and B(lue) values toward cooler (toward blue) or warmer (toward red). Tint does the same thing but for the green value, which white balance actually leaves untouched.
If you want to play around, here's a little simulator that does this for ONE pixel. Just set the base color and mess with the sliders. Have fun 🙂
Comments
Replies come from Mastodon. Reply to this post to join in.